Four Essential Elements
I’m going to share with you four essential elements to successful bird photography that will transform your images almost overnight. Once you learn and use these elements you will look at bird photography in a whole new way. In fact, you may actually take less photos because you’ll know if you can’t use these elements, then you shouldn’t be taking the photo.
The 4 Elements are in no certain order
- Lighting
- Background Separation
- Eye in Focus
- Rule of Thirds
Simple right? I promise you, once you learn and implement these four key elements in your bird photography, your images will improve dramatically. In fact, people may say,” Did you get a new camera?”, or my favorite: “You must have an awesome lens!” LOL.
Lighting
Lighting can make or break your bird photos! In my opinion, the best times to photograph birds are early morning and late evening. In between these times I live my life, you know, work, chores, eating, etc. The raking sunlight over the birds feathers really brings out the detail. I set my bird studio up so the bird is always looking into the light or flying into the light, avoiding dark shadows on the face. Because the sun rises in the East and sets in the West, I may move my prop to face the sun depending on the prop I am using at the time.
If you’re using a single horizontal perch, you will need to turn it hard towards the sun because you don’t want to split the birds face with the Sun on one side and a dark shadow on the other side. For example, we don’t want the bird looking straight at us, the bird needs to be facing more towards the feeder.
Avoid shooting in mid-day with the bright Sun high overhead. The lighting is not flattering. Here’s a secret someone shared with me. When your shadow is taller than you, it’s time to begin shooting!
(TIP), I always try to get a shot with the Sun showing in the bird’s eye. In photography terms it’s called a “Catchlight”. This light brings the eye to life versus a completely black eye. Go online and look at a bunch of bird photos on Instagram, I will bet most bird images don’t have a light in the eye.
Admittedly, I don’t always depend on great sunlight because those days are far and few anymore. I do shoot when I can on bright overcast days as long as I can get a fast shutter speed and avoid a high ISO. Overcast lighting won’t be as dramatic as raking sunlight, but it gives you some camera time and a chance to practice.
Learn to “see the light”. Use it to your advantage to create the best possible bird images you can. Birds have lots of detail, it’s our job when photographing them to show our viewers the detail. Photographing flying birds is easy when once you master the lighting. Don’t make it harder than it is.
In the 2 images below, I set the prop up so the bird will face into the sunlight. That was easy right? You’ve won half the battle. Next you focus on the bird. Start shooting when you think it’s going to take off. When it takes off, you have a beautiful, well lit image of a bird in flight!
You can stop right now, go outside and try this, and I guarantee you will see instant improvements in your bird photos. It’s that easy.
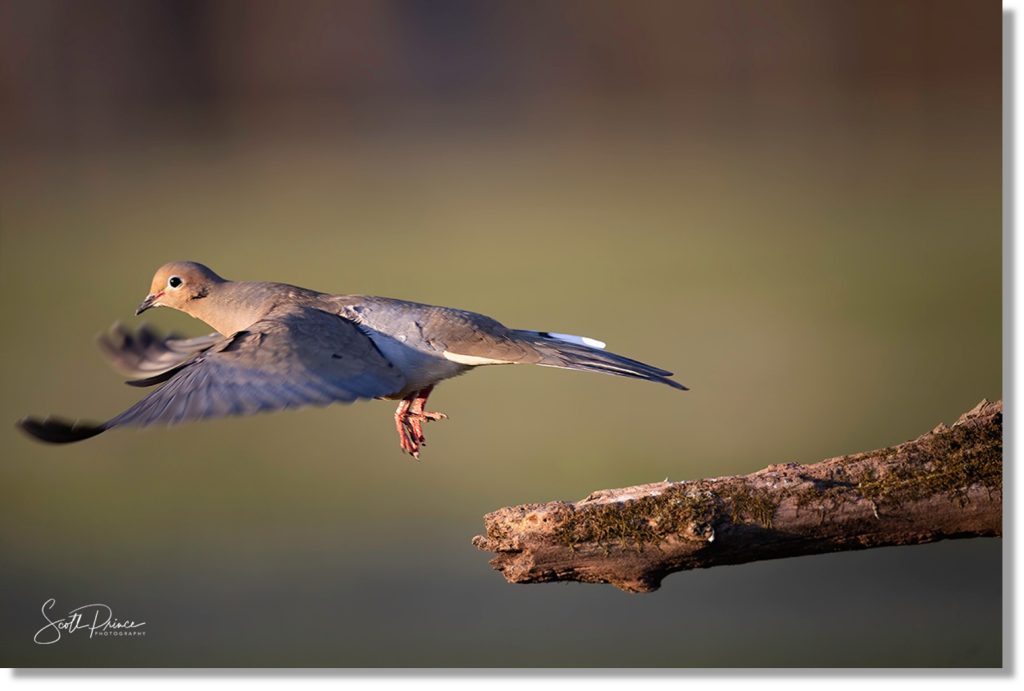
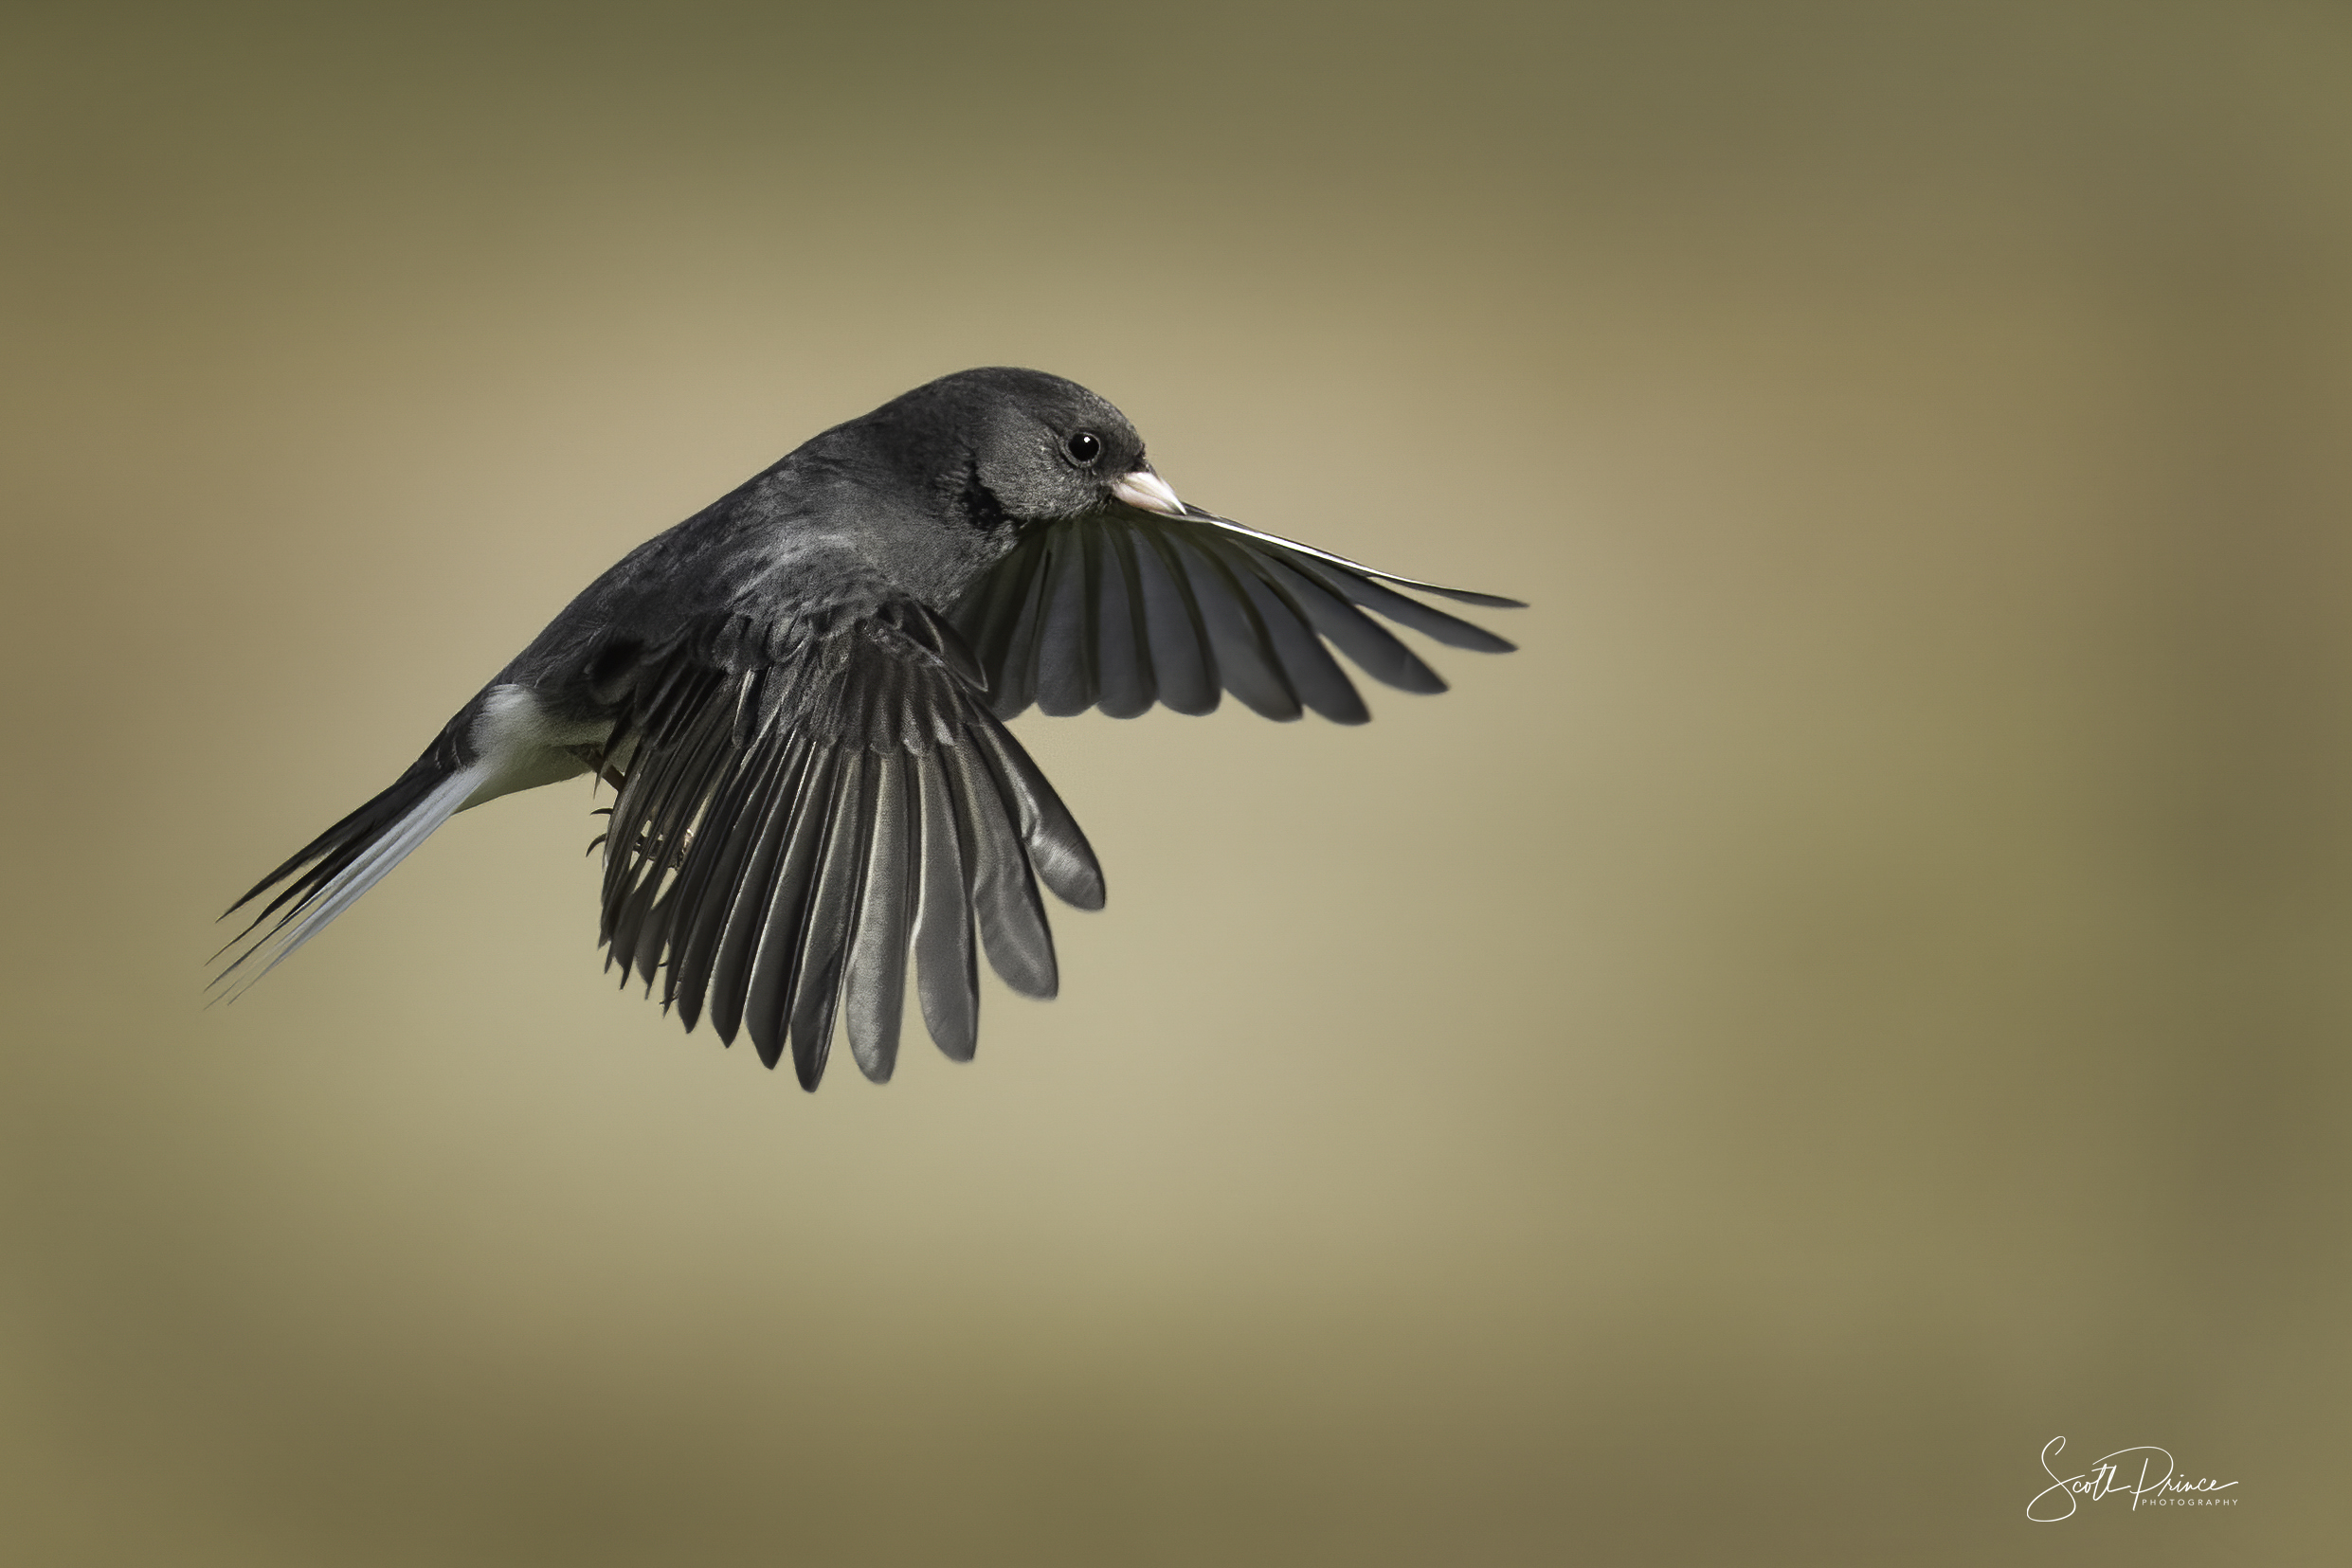
IMAGE DATA: Canon EOS R. Canon 500 mm f/4mk ii lens. 1/2500, f/5, ISO 1000
Mourning dove flying into the setting Sun. (NOTE: Normally I like to have space for the bird to fly into, which this doesn’t have but I thought it was a really cool shot )See the catchlight in the eye? Practice this easy shot over and over until you’ve mastered it. When the bird lands on the perch, begin to focus on the eyeball.
Now the bird may sit there for a minute or two until it decides to fly towards the feeder that we can’t see out of frame.
When you think the bird is going to take off, fire away and pan along with the bird trying to maintain focus on that eyeball. Do this enough and you’ll be able to predict when the bird is going to fly.
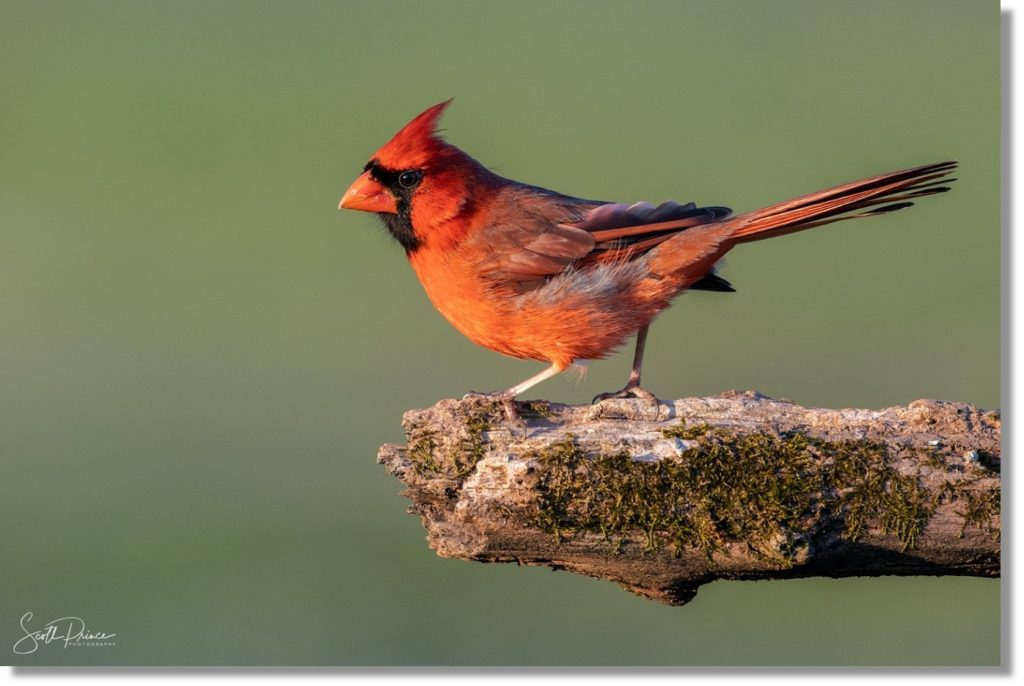
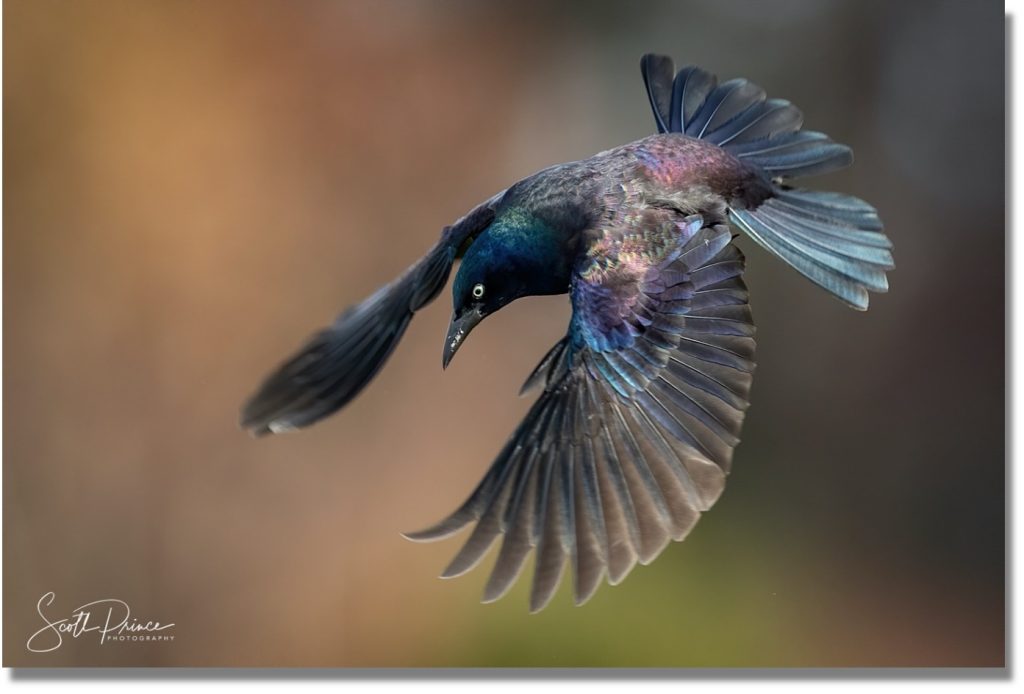
IMAGE DATA: Canon EOS R. Canon 500 mm f/4mk ii lens. 1/2500, f/5, ISO 1000
Another example of a catchlight in the bird’s eye! If the bird flies in a completely different direction, no big deal, you’ll still wind up with a nice portrait.
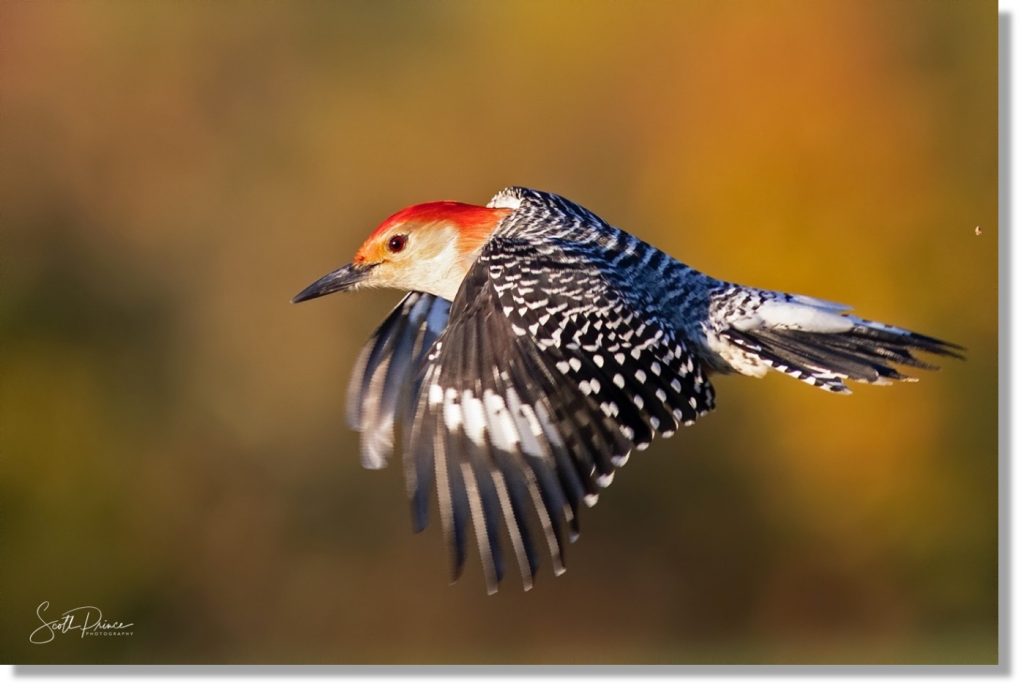
IMAGE DATA: Canon EOS R. Canon 500 mm f/4mk ii lens. 1/2500, f/5, ISO 1000
Although the bird below is facing into the sun, having its head turned creates a shadow on the side of the head. Not a good shot. How many shots have you seen online like this or how many photos have you created that look like this?
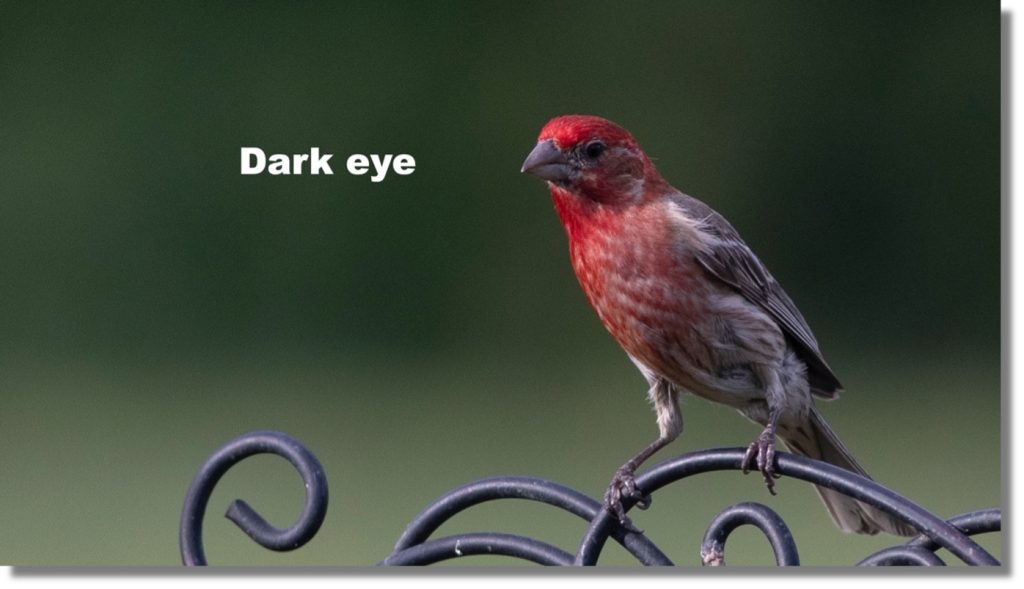
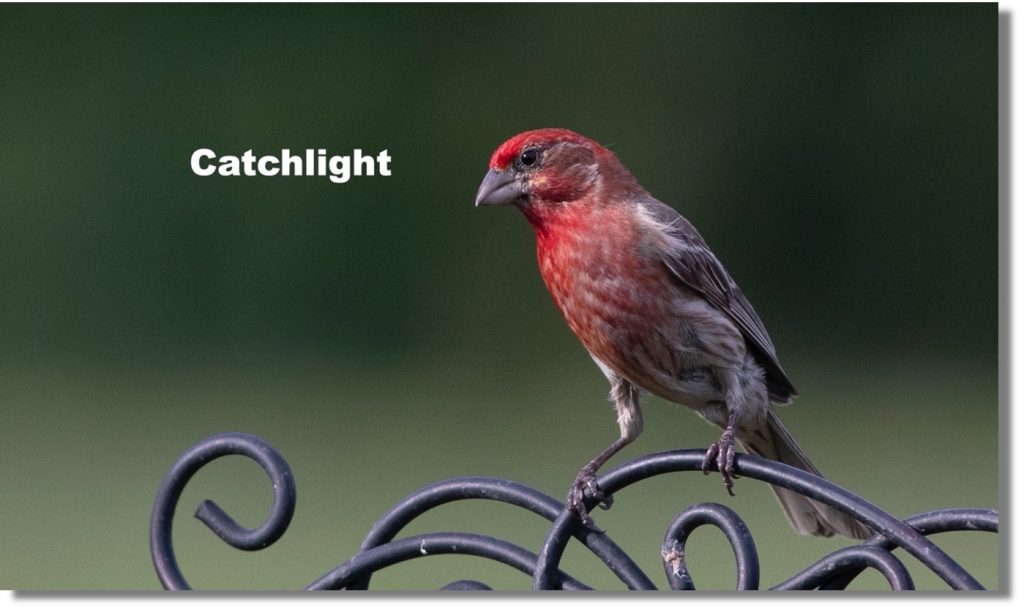
Keep looking through the view finder until the bird turns its head and the harsh shadow disappears. Now can you see the light in the bird’s eye? Instant improvement!! It’s these little secrets that will instantly improve your bird photos!
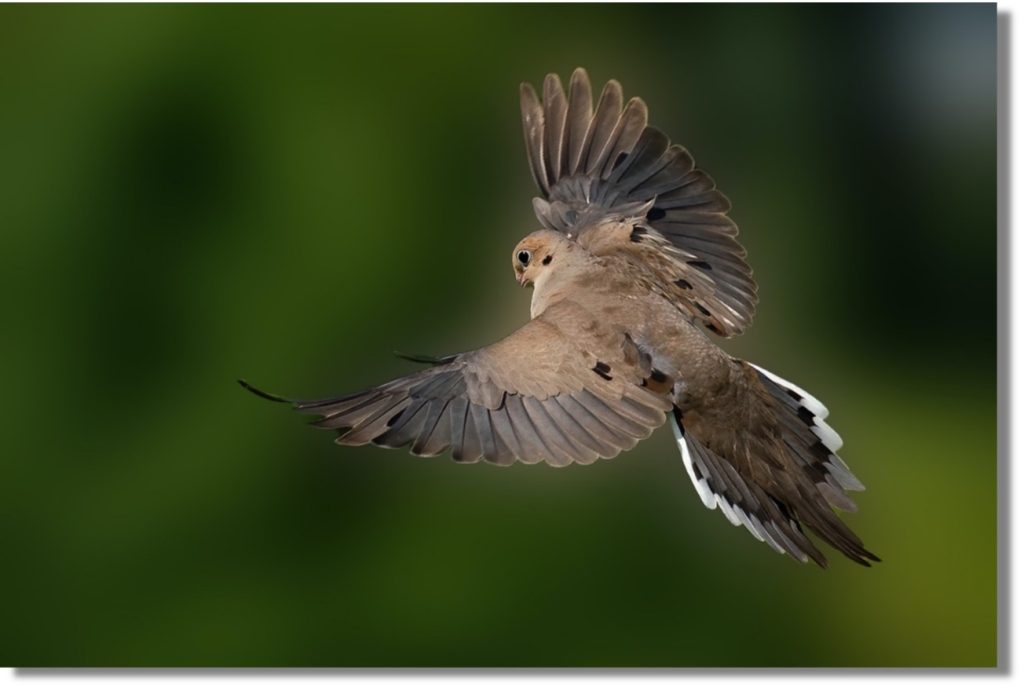
BACKGROUND SEPARATION
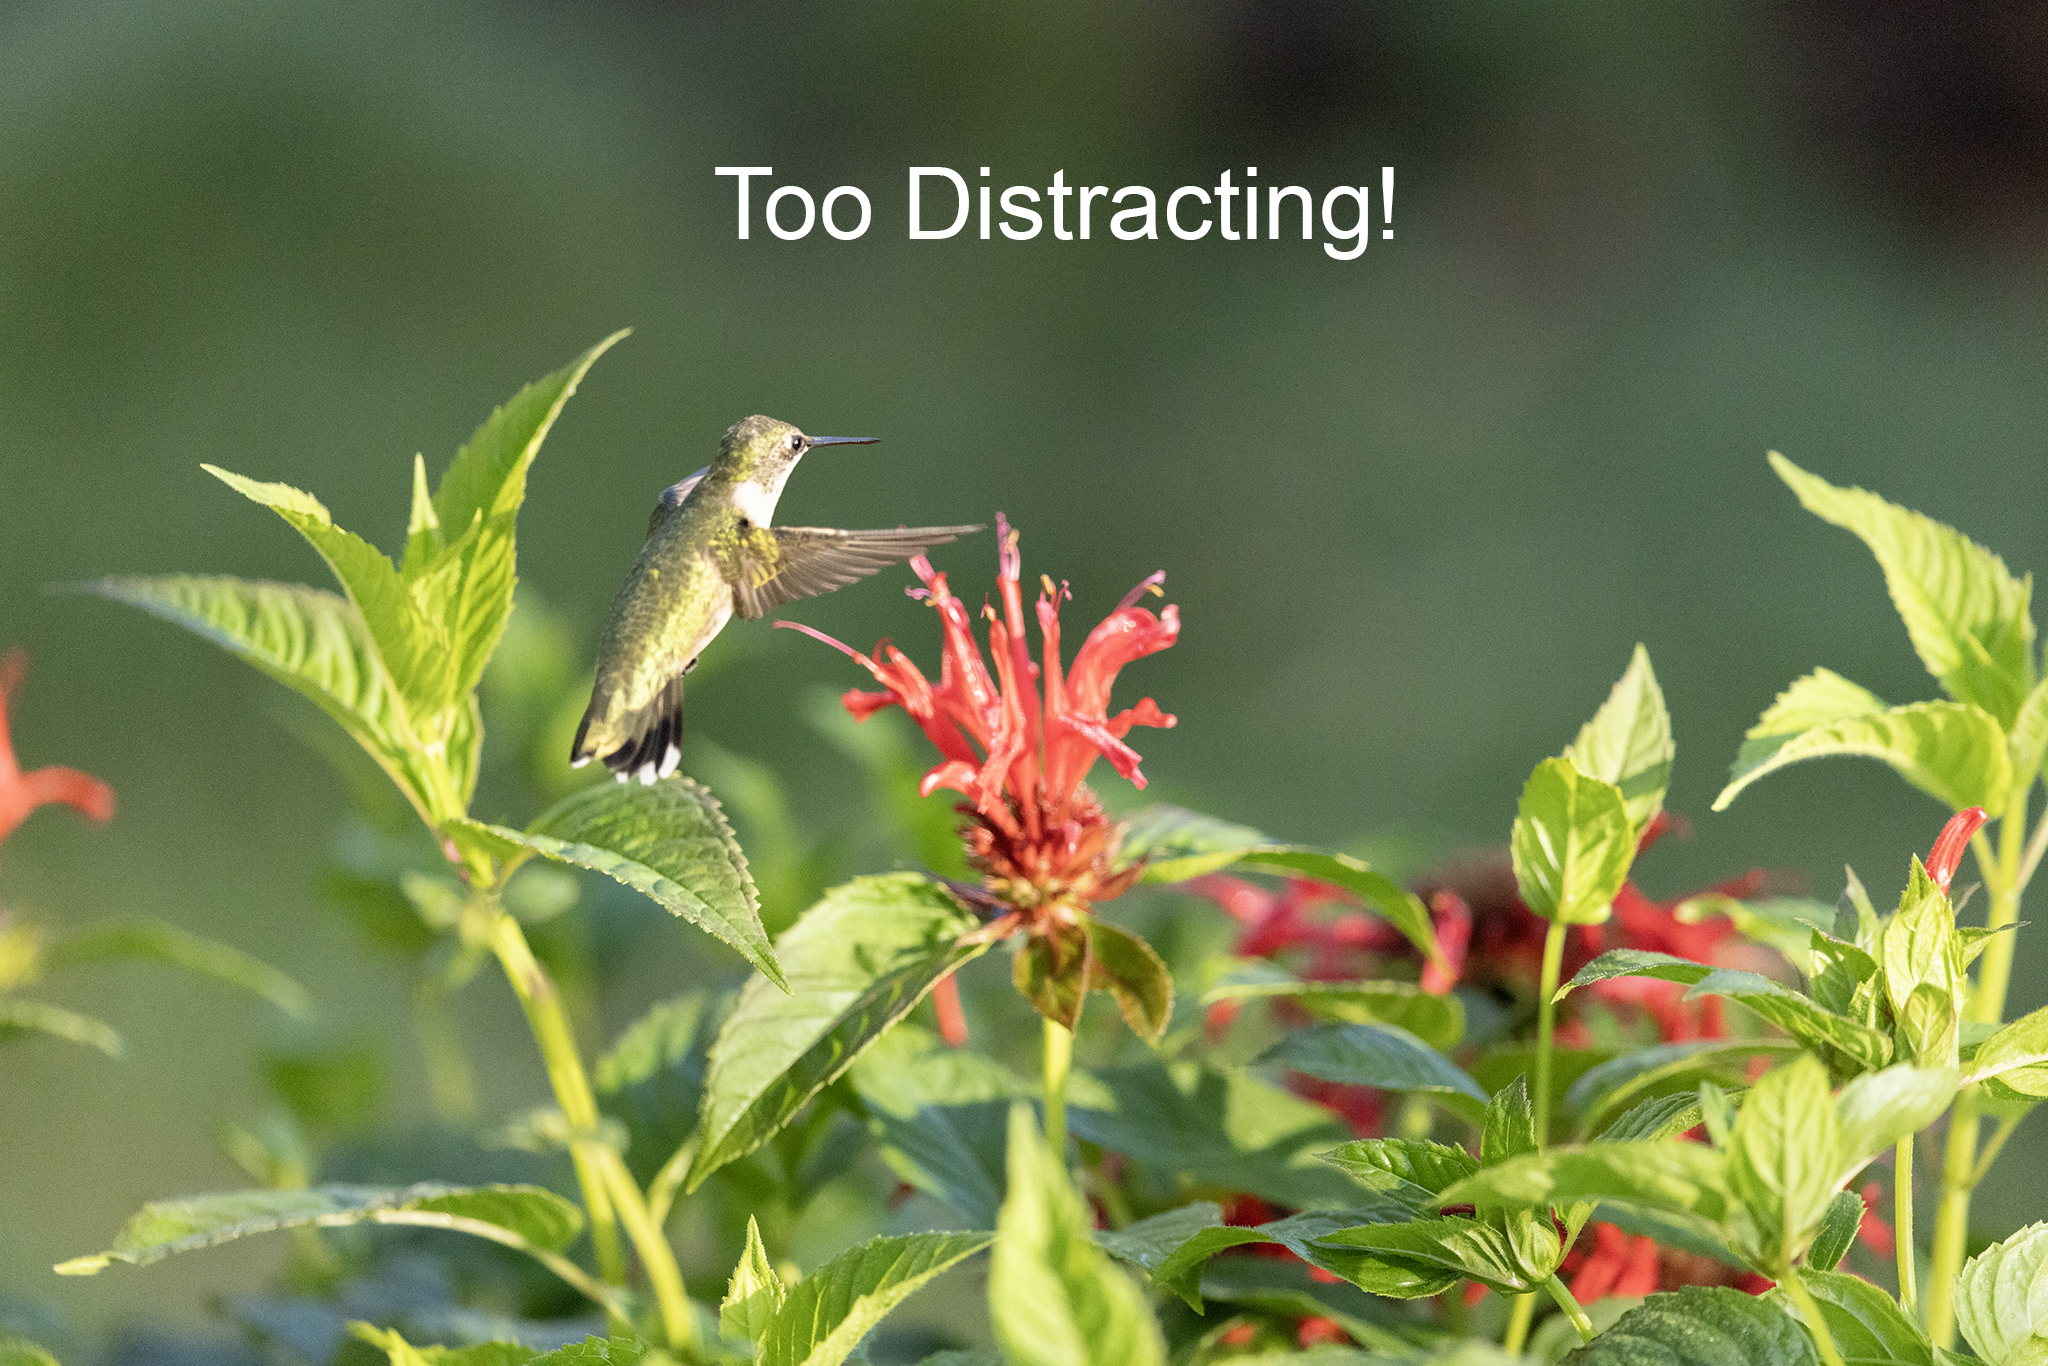
Just as important as lighting is background separation. What I mean by this is to have a nice clean soft blurred background. This will help make the bird “pop” from the image. We want to avoid having foreign obstacles like vehicles, branches, or bright lights in the background.
Almost every one of my images has a nice clean background. Why? Because I made it that way. If I can’t get the background the way I want it, I’ll move the feeder or prop to a nicer location.
The majority of the backgrounds in my images are trees and bushes across the street, and I use them to my advantage. NOTE: The closer the bird is to the backdrop, the more the backdrop will be in focus, so pay attention to that.
Try this. You can practice it on any object no matter what, even a soda can on a table. Look at the object, then the background. Is the background distracting or competing with the object? If so, move around left or right, up or down and find the best background.
Now you want to be cool doing this because if you’re like me, you’ll do it without realizing it and people will ask you what the hell are you looking at or are you okay?
Below are a few shots utilizing a nice clean background. See how the bird pops out of the photo? The bird is the subject, that’s all we want the viewer to see.
EYE IN FOCUS
The best lighting or cleanest background doesn’t mean anything if the bird’s eye is out of focus. I personally had to delete some awesome action shots because the bird’s eye was out of focus. It’s pretty devastating to have a really cool action shot and the bird’s head/eye are not in focus.
In the image below, the birds right wing is out of focus, but that’s okay because the eye is in sharp focus. This is something you may need to practice on. Unless your camera has eye tracking, you’ll need to get the focus points on the head of the bird.
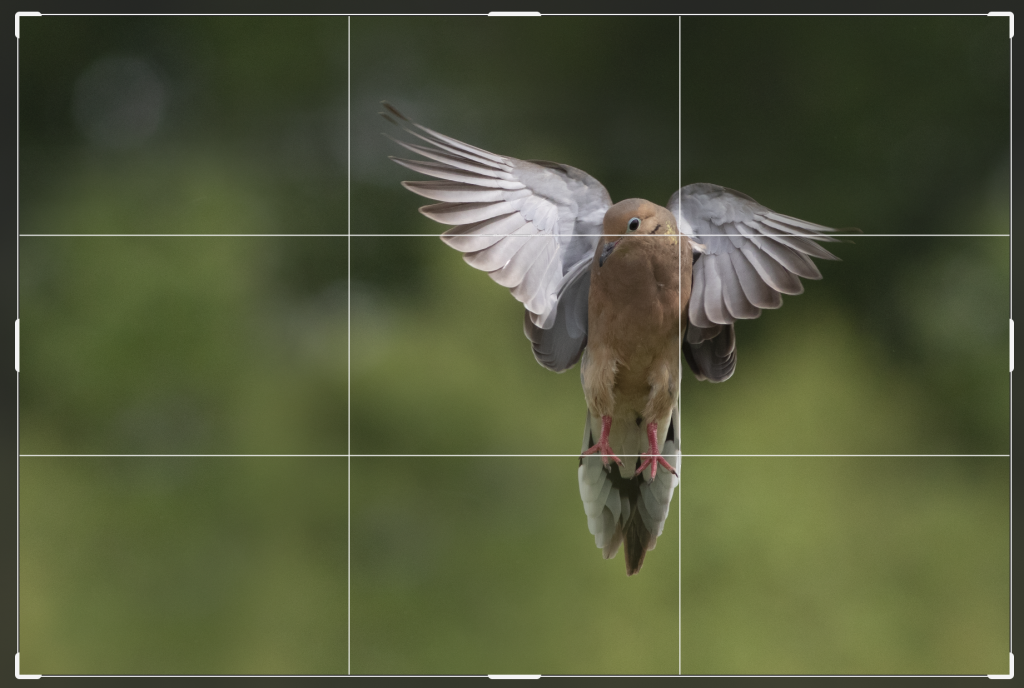
RULE OF THIRDS
The Rule of Thirds is a simple concept. In a nutshell all it means is to avoid, if possible, placing the (subject) bird dead in the middle of the image like the Bluejay below.
I always try to give my birds a space to fly into. This space helps to create a sense of motion or flight.
When using the rule of thirds, leave more empty space in front of the bird, not behind it.
It may not always be possible to use the rule of thirds, especially if you just nailed a nice shot of a fast flying bird but keep it in mind. I would not delete a killer image because it didn’t have enough empty space in front of it. As a matter of fact, on several occasions I have expanded the Canvas size in Photoshop and changed my crop.
Give some of these ideas a try. I think you’ll see a noticeable improvement in your backyard bird photography!